Whether you’re preparing for a corporate headshot, a fashion photoshoot, or a special event, makeup plays a crucial role in ensuring you look your best in front of the camera. Professional photoshoots often require makeup that enhances your features, withstands lighting conditions, and translates well on camera. With the right techniques and products, you can achieve a polished look that not only looks great in person but also on film. Here’s a guide to makeup for professional photoshoots, offering tips to help you shine under the camera’s gaze.
- Start with a Clean, Hydrated Canvas
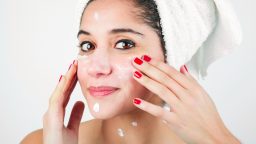
Before applying any makeup, it’s essential to prepare your skin. Clean and hydrated skin provides the best base for makeup application and helps products sit well throughout the shoot.
- Cleanse: Use a gentle cleanser to remove any dirt, oil, or previous makeup. A fresh face allows the makeup to apply smoothly.
- Exfoliate: If time allows, exfoliate your skin to remove dead skin cells, creating a smooth surface for makeup. Be careful not to over-exfoliate, as it could lead to irritation or dryness.
- Moisturise: Apply a hydrating moisturiser suited to your skin type. This step ensures your skin stays hydrated throughout the shoot, especially under the studio lights, which can often be drying.
Additionally, consider using a hydrating face mask the night before the photoshoot to give your skin an extra boost of moisture and glow.
- Use a Pore-Minimising Primer
A good primer is essential for creating a smooth, flawless base. It helps makeup adhere better, lasts longer, and prevents it from settling into fine lines or pores. Opt for a pore-minimising primer if you have larger pores or want to achieve a smooth, even surface.
- Silicone-based Primer: A primer with a silicone base helps blur the appearance of pores and creates a mattified surface. This is particularly useful for photographs, as it reduces the risk of excess shine from flash photography.
- Hydrating Primer: If your skin tends to be dry, choose a hydrating primer that adds moisture while still providing a smooth base for foundation.
Using a primer will also help your makeup stay in place, reducing the need for touch-ups throughout the shoot.
- Choose the Right Foundation for Your Skin Type
Foundation is one of the most important elements in achieving flawless skin in professional photoshoots. The goal is to create an even complexion that looks natural on camera, without appearing cakey or too shiny.
- Matte Foundation: If you have oily skin, a matte foundation is the best option. It helps control shine and provides a more polished, airbrushed finish that looks great under studio lighting.
- Dewy Foundation: For dry or normal skin, a dewy foundation gives a radiant, healthy glow that looks flattering under the lights.
- Full Coverage vs. Light Coverage: Choose a full-coverage foundation if you need to conceal blemishes, redness, or uneven skin tone. However, if you have good skin, go for a light to medium coverage foundation for a more natural look.
- Long-Wearing Foundation: Professional photoshoots can last for hours, so it’s crucial to choose a long-wearing foundation that won’t fade or settle into lines.
Make sure to blend your foundation well, particularly around the jawline and neck, to ensure there are no harsh lines.
- Conceal Under-Eye Circles and Imperfections
To ensure you look well-rested and fresh in photos, use a concealer that’s a shade lighter than your skin tone to brighten dark circles and conceal any blemishes. This helps your eyes stand out and gives your skin a radiant, even look.
- Under-Eye Concealer: Use a creamy, hydrating concealer for the under-eye area to cover dark circles and puffiness. The formula should be lightweight yet pigmented enough to provide full coverage.
- Spot Concealing: Use a full-coverage, thicker concealer to cover any blemishes, redness, or other imperfections. Dab the concealer gently with your finger or a brush to blend it seamlessly into the foundation.
Avoid using too much concealer, as it can appear heavy on camera. A light layer is usually enough for professional shoots.
- Set with Powder for a Matte Finish
Setting your makeup with a translucent powder is essential to lock everything in place and ensure it stays fresh throughout the shoot. It also prevents shine from building up under the lights, which can be particularly noticeable in close-up shots.
- Translucent Setting Powder: Use a light dusting of translucent powder to set your makeup without adding any colour. Apply the powder to areas that tend to get oily, such as the T-zone (forehead, nose, chin).
- Avoid Over-Powdering: Be careful not to apply too much powder, as it can make the skin look dry or cakey. A light application is enough to ensure a matte finish.
Some makeup artists prefer to use a setting spray after powder to give the face a dewy finish and lock in makeup for the long haul.
- Sculpt and Define with Contour and Highlight
Subtle contouring and highlighting can add depth and dimension to your face, ensuring that your features are defined on camera. Professional photoshoots often require a little more definition than everyday makeup, but avoid harsh lines.
- Contouring: Use a matte bronzer or contour powder to gently sculpt your cheekbones, jawline, and the sides of your nose. Focus on creating shadows that define the face without looking overly dramatic.
- Highlighting: Apply a soft, natural highlighter to the high points of your face—your cheekbones, brow bones, down the bridge of your nose, and on the cupid’s bow. This adds a subtle glow without being too reflective.
Stick to matte and satin formulas for contouring and highlighting, as they look better on camera than products with chunky glitter or shimmer.
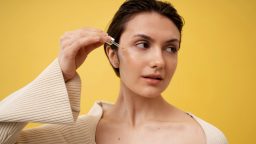
- Perfect Your Eyebrows
Eyebrows frame your face, and in a photoshoot, they play an important role in defining your overall look. Well-groomed brows can make your eyes pop and help balance your facial features.
- Fill in Sparsely: Use a brow pencil, powder, or gel to fill in any sparse areas and create natural-looking brows. Opt for a colour that closely matches your natural brow shade.
- Set Brows in Place: Use a brow gel to set your brows in place and keep them looking neat throughout the shoot. Clear brow gel works for most people, but you can opt for a tinted gel for more definition.
Strong but natural-looking brows work best for photos, so avoid overly sculpted or harsh brows.
- Enhance Your Eyes with Eyeshadow and Mascara
Your eyes are often the focal point of photos, so enhancing them with eyeshadow and mascara is a must for professional shoots.
- Neutral Eyeshadow: For most professional photoshoots, opt for neutral, matte eyeshadow shades like soft browns, taupes, or peaches. These shades enhance your eyes without overpowering the overall look.
- Eyeliner: A thin line of eyeliner along the upper lash line can define the eyes and make them appear larger. Avoid using heavy eyeliner on the lower lash line, as it can make the eyes appear smaller in photos.
- Mascara: Apply a couple of coats of mascara to add volume and length to your lashes. Waterproof mascara is a good choice, as it ensures that your lashes stay curled and defined throughout the shoot.
Consider adding individual false lashes or strip lashes for extra volume and definition, especially for close-up shots.
- Finish with a Long-Lasting Lip Colour
The right lip colour can elevate your look and complete your makeup for a photoshoot. Go for a shade that complements your overall makeup and wardrobe. For professional photos, it’s best to stick with shades that are flattering but not overly bold.
- Nude and Soft Pink Shades: Nude, soft pink, or peachy tones work well for most professional photoshoots, providing a natural, polished look.
- Matte Lipstick: Matte lipstick is ideal for photos, as it stays in place and doesn’t shine under the camera. Choose a matte formula that feels comfortable and won’t dry out your lips.
- Lip Gloss: If you prefer a bit of shine, apply a light layer of lip gloss to the centre of your lips to create fullness without it being too overpowering.
For a polished look, use a lip liner to define your lips before applying lipstick.
Conclusion
When it comes to makeup for professional photoshoots, the key is to create a polished, timeless look that enhances your natural features without being too heavy. Focus on a smooth, well-prepped base, defined eyes, and subtle contouring to ensure you look your best in front of the camera. With these tips, you can achieve a flawless makeup look that translates beautifully under the studio lights and captures your best self.